

ST-200 Rear Strut Bar Install by PuckPuck
Ok First off, if you had to pay someone to install your exhaust... DO NOT ATTEMPT THIS. Honestly you will need to have some kind of mechanical know how to do this. This is a 2 person 1/2 case of beer job. You will NEVER get this done with just one person (unless you are extremely creative). Also about this how to, Left side of car and Driver side is the same thing.
Tools you will need:
You will also notice that each plate has curves in them, this is to follow the body lines of the panel (talk about over-engineering).
2. Once you have checked all the parts, take one of the larger bolts and try to put it through the holes on the main bar. Notice how it doesn't fit, you have one of two choices. Go to the store and get "slightly" smaller in diameter bolts/lock nuts, or use the 3/8" drill bit and drill out the holes on the main bar, and on the brackets. Take your time and push lightly, they will bore out. This is what we did. It works just as well this way.
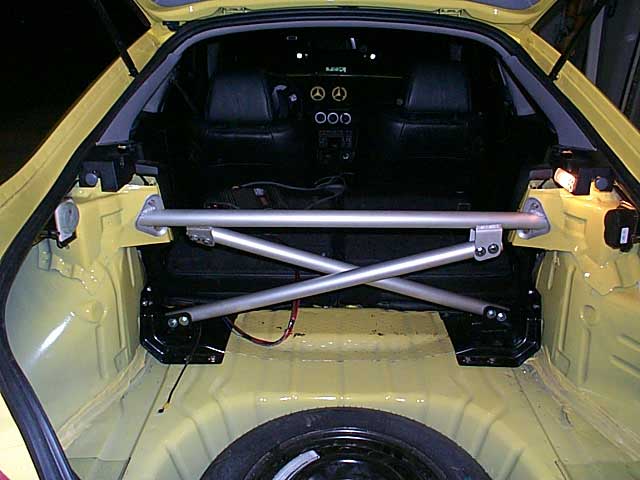
3. Now dry fit everything outside of the car. Hold the main bar up, then line up the 2 cross bars (yes they are different, look at how the holes on either end line up), and just set the cross bars into the brackets, and put the bolts in (not tight)....
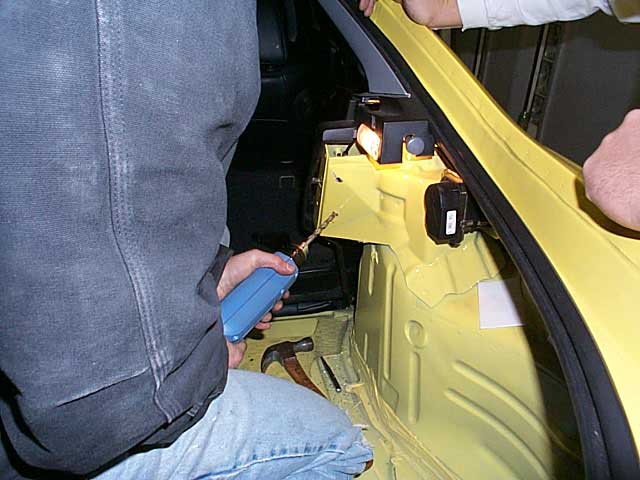
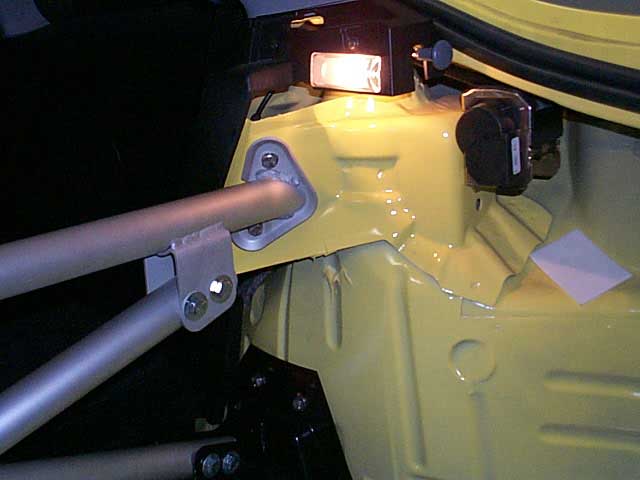
4. Now empty out your trunk and fold the seats down. Take your lightly assembled bar and put it in the trunk. The main bar will go on the strut towers, there is like a triangle section on them and they go right there and lines up perfect with the triangle. Get everything to fit pretty snug, then using a marker mark the holes for the upper bar only on the triangle portions. Before marking this hole make sure everything is perfect (measure 3X cut/drill once). Only mark the upper holes
5. Put the bar aside and drill out the holes. You may want to use a hole punch before drilling out all your holes.
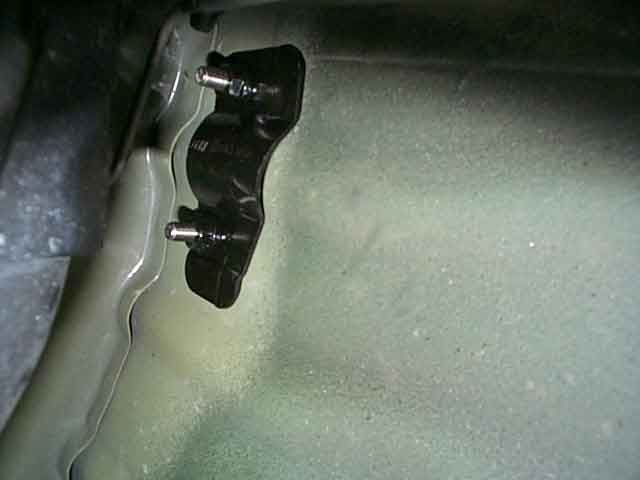
6. Put bar back, hold the triangle backing plates from the bottom and put the bolts in loosely. Don't worry when you are done you tighten everything down.
7. Now make sure both lower brackets are snug against the towers and everything lines up, then mark the holes for the lower brackets. There are 7 holes per bracket.
8. Jack the rear of the car up, set on jack stands. Remove both rear wheels.
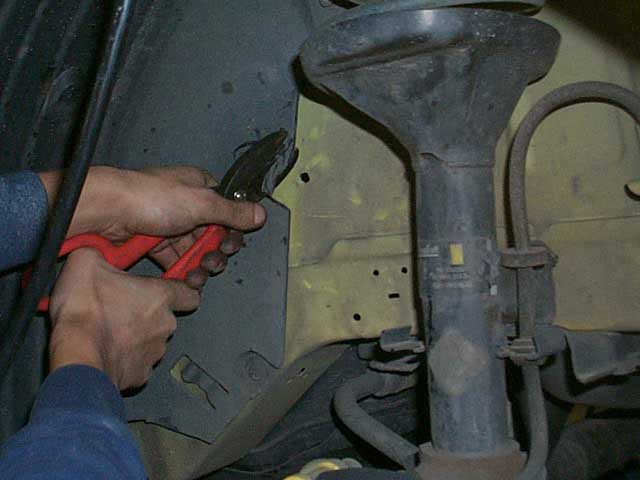
9. Drill out the upper holes only (thoses against the actual strut towers) on the lower brackets. When done look in the wheel well. You'll notice one hole will either go just through or just next to the wheel well liner. You may need to cut or trim the liner, you can do it while it's still in the car, essentially take the "L" plate position it over the proper holes, and wherever the liner would interfere just trim it away with the knife or snips.
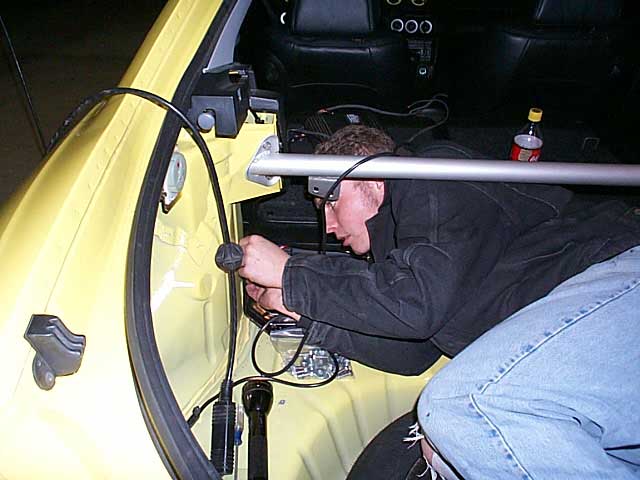
10. Now remove the cross bars from the lower brackets, line up the brackets, and have the other person line up the "L" backing plate. This backing plate will cover the holes in the actual strut tower for the bracket. You line it up from inside the wheel well. Put the bolts in, you may notice a little difficulty doing this, at least we did, what we did to solve it, is use the slightly larger drill bit and bore out the holes just a little more that we made on the body panels.
11. When done doing both "L" backing plates, drill out all the other holes for the lower brackets. Do not drill down to far on the right side, there is some lines there, they are protected, but just don't sit there and play with the drill through the hole.
12. Get under the car and do the small backing plate. This backing plate covers the rear holes of the bracket. The straight edge of the backing plates will always line up with the inside portion of the bracket. You will notice that they are slightly angled, this is because they fit in a certain way, look up there and you'll see how they go in, just put the straight edge with the straight frame rail.
13. Now do the mid-size backing plate. This backing plate covers the front holes of the bracket. To get to this one you may need some small hands and a little fiddling to line it up right but it's very possible. Do to this one you may also need to just remove the main bushing brackets for the rear sway bar to get your hands in. On the Left side it's almost a must. The main bushing brackets are 15mm I think, and there are just one per side.
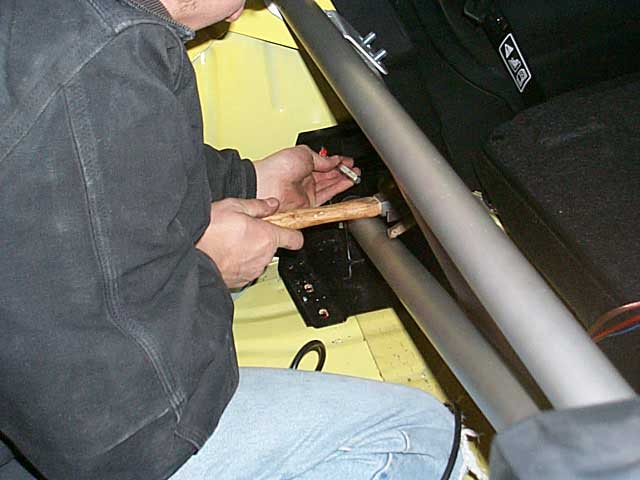
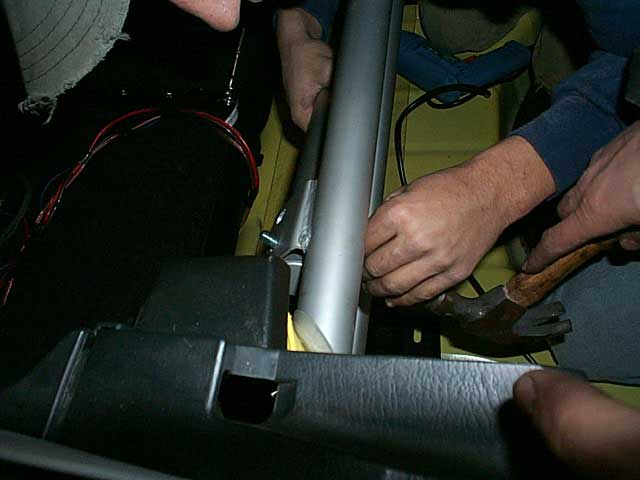
14. Put the cross bars back in and tighten everything down real good. You may notice it being a little tight to do this. Using your hammer just tap the bolts through.
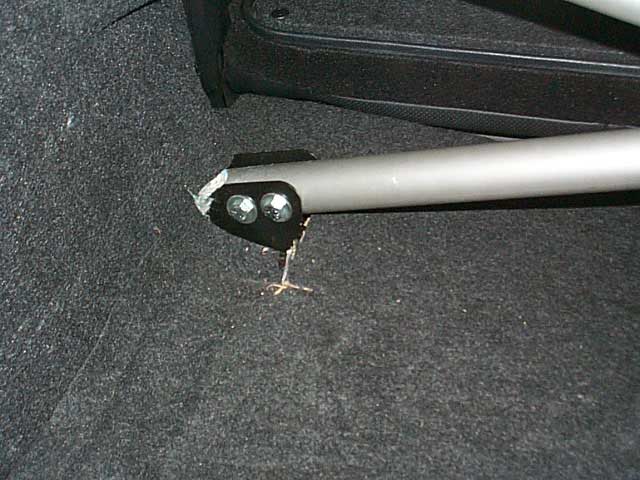
15. Put your car back together, you will need to trim the carpet slightly. No big deal.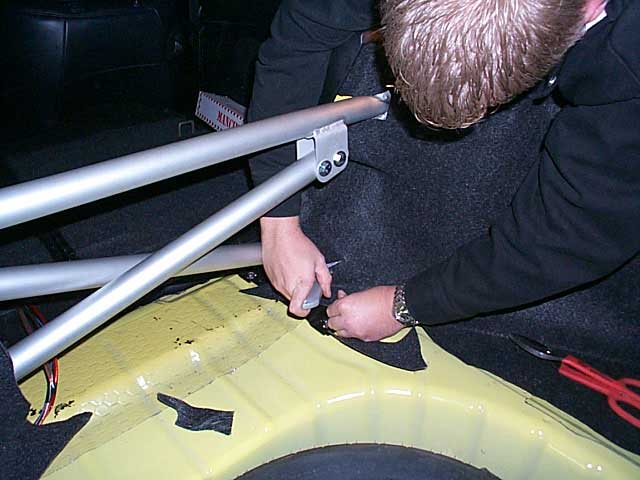
15. What are you waiting for.... HIT SOME TWISTIES :)
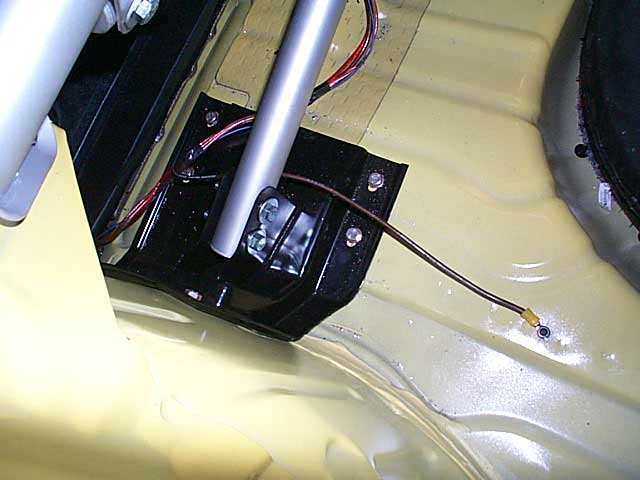
Notes: The Left side mid-sized backing plate was a pain in the ass. You have no room to hold it up. Here's what we did: We took this small piece of i don't know what but it fit throught he main hole and had a bigger end so it won't go right through. Then I lined it up with the outside hole, put it throught he body from underneath, then the other person in the trunk would pull and hold it up. Because this little bar wouldn't go through the hole, he was able to just hold the backing plate up there, while I lined up the other hole using a small screwdriver. Then we put the bolt in on that hole, let go of the thing-a-ma-jig and using the screwdiver again, lined up the other hole and put the bolt in. You can do it that way or just get the sway bar out of the way.
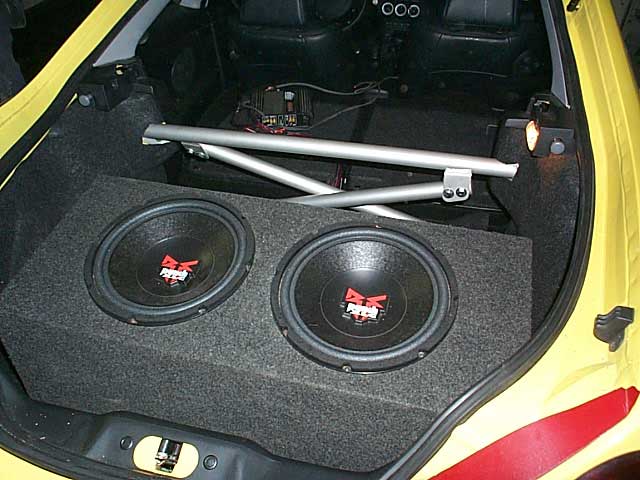
Thoughts: Whoever engineered this bar had no budget in mind. This thing is the best strut bar I have ever seen for any car anywhere. It is well built, well engineered, uses 8 guage aluminum 2.5" tubing. It's like having a roll cage in the rear of your car. There were concerns about being bumped up a class in AutoXing because of the cross braces, if that is the case, when you go AutoXing, just remove the cross braces, even the main bar would be better then any other bar I have seen, because of it's size, the way it mounts (using the backing plates) and the thickness of the material.
If you have any questions or concerns let me know. If you are scared to install this yourself, I beleive me and exigent will do the install for you for a fee that has yet to be determined, but it will be fair and cheaper then any shop out there.
Tools you will need:
-
Ractchet Driver
13mm socket
15mm socket
15mm wrench
hammer
drill
3/8" drill bit
a bit slightly larger then 3/8" also (exact size isn't that important)
Jack
Jack Stands
Lug wrench to remove wheels.
A Pair of good snips, or strong utility knife.
1/2 case of beer
-
Main Bar: I have no idea of this part number but it should be very obvious.
Top Left -> Bottom Right Cross bar: C46812 AA
Top Right -> Bottom Left Cross bar: C46812 AB
Triangle brackets: never checked but it's very obvious also, both are identical.
Left Bracket: C106A75
Left "L" plate: C111B77
Left small plate: C103K71
Left mid-size plate: C104A69
Right Bracket: C106A74
Right "L" plate: C111B76
Right small plate: C103K70
Right mid-size plate: C104A68
You will also notice that each plate has curves in them, this is to follow the body lines of the panel (talk about over-engineering).
2. Once you have checked all the parts, take one of the larger bolts and try to put it through the holes on the main bar. Notice how it doesn't fit, you have one of two choices. Go to the store and get "slightly" smaller in diameter bolts/lock nuts, or use the 3/8" drill bit and drill out the holes on the main bar, and on the brackets. Take your time and push lightly, they will bore out. This is what we did. It works just as well this way.
3. Now dry fit everything outside of the car. Hold the main bar up, then line up the 2 cross bars (yes they are different, look at how the holes on either end line up), and just set the cross bars into the brackets, and put the bolts in (not tight)....
4. Now empty out your trunk and fold the seats down. Take your lightly assembled bar and put it in the trunk. The main bar will go on the strut towers, there is like a triangle section on them and they go right there and lines up perfect with the triangle. Get everything to fit pretty snug, then using a marker mark the holes for the upper bar only on the triangle portions. Before marking this hole make sure everything is perfect (measure 3X cut/drill once). Only mark the upper holes
5. Put the bar aside and drill out the holes. You may want to use a hole punch before drilling out all your holes.
6. Put bar back, hold the triangle backing plates from the bottom and put the bolts in loosely. Don't worry when you are done you tighten everything down.
7. Now make sure both lower brackets are snug against the towers and everything lines up, then mark the holes for the lower brackets. There are 7 holes per bracket.
8. Jack the rear of the car up, set on jack stands. Remove both rear wheels.
9. Drill out the upper holes only (thoses against the actual strut towers) on the lower brackets. When done look in the wheel well. You'll notice one hole will either go just through or just next to the wheel well liner. You may need to cut or trim the liner, you can do it while it's still in the car, essentially take the "L" plate position it over the proper holes, and wherever the liner would interfere just trim it away with the knife or snips.
10. Now remove the cross bars from the lower brackets, line up the brackets, and have the other person line up the "L" backing plate. This backing plate will cover the holes in the actual strut tower for the bracket. You line it up from inside the wheel well. Put the bolts in, you may notice a little difficulty doing this, at least we did, what we did to solve it, is use the slightly larger drill bit and bore out the holes just a little more that we made on the body panels.
11. When done doing both "L" backing plates, drill out all the other holes for the lower brackets. Do not drill down to far on the right side, there is some lines there, they are protected, but just don't sit there and play with the drill through the hole.
12. Get under the car and do the small backing plate. This backing plate covers the rear holes of the bracket. The straight edge of the backing plates will always line up with the inside portion of the bracket. You will notice that they are slightly angled, this is because they fit in a certain way, look up there and you'll see how they go in, just put the straight edge with the straight frame rail.
13. Now do the mid-size backing plate. This backing plate covers the front holes of the bracket. To get to this one you may need some small hands and a little fiddling to line it up right but it's very possible. Do to this one you may also need to just remove the main bushing brackets for the rear sway bar to get your hands in. On the Left side it's almost a must. The main bushing brackets are 15mm I think, and there are just one per side.
14. Put the cross bars back in and tighten everything down real good. You may notice it being a little tight to do this. Using your hammer just tap the bolts through.
15. Put your car back together, you will need to trim the carpet slightly. No big deal.
15. What are you waiting for.... HIT SOME TWISTIES :)
Notes: The Left side mid-sized backing plate was a pain in the ass. You have no room to hold it up. Here's what we did: We took this small piece of i don't know what but it fit throught he main hole and had a bigger end so it won't go right through. Then I lined it up with the outside hole, put it throught he body from underneath, then the other person in the trunk would pull and hold it up. Because this little bar wouldn't go through the hole, he was able to just hold the backing plate up there, while I lined up the other hole using a small screwdriver. Then we put the bolt in on that hole, let go of the thing-a-ma-jig and using the screwdiver again, lined up the other hole and put the bolt in. You can do it that way or just get the sway bar out of the way.
Thoughts: Whoever engineered this bar had no budget in mind. This thing is the best strut bar I have ever seen for any car anywhere. It is well built, well engineered, uses 8 guage aluminum 2.5" tubing. It's like having a roll cage in the rear of your car. There were concerns about being bumped up a class in AutoXing because of the cross braces, if that is the case, when you go AutoXing, just remove the cross braces, even the main bar would be better then any other bar I have seen, because of it's size, the way it mounts (using the backing plates) and the thickness of the material.
If you have any questions or concerns let me know. If you are scared to install this yourself, I beleive me and exigent will do the install for you for a fee that has yet to be determined, but it will be fair and cheaper then any shop out there.